Showing posts with label blogging tips and tricks. Show all posts
Showing posts with label blogging tips and tricks. Show all posts
Monday, 3 October 2011
Popular Post Widget i.e Most commented Posts for blogger as is very great widget to show of your posts,which your readers most liked and expressed there love in comments.You will love to use this widget in your blog for sure.It is very easy to install just have to add small bit of javascript codes to your blog sidebar.
How to install this widget:-
Go to Layout > Add page Element > Html/Javascript
Add the below code there
Change the code in red above with the your blog name and in green to show how many posts you want to display and please don't remove he credit's.Now save it.
Using above codes will show total no of comments in front of posts if you dont wanna show them use below codes
I hope you will like this widget for sure Enjoy !!!
Monday, 3 October 2011 2
Wednesday, 28 September 2011


Friday, 26 August 2011
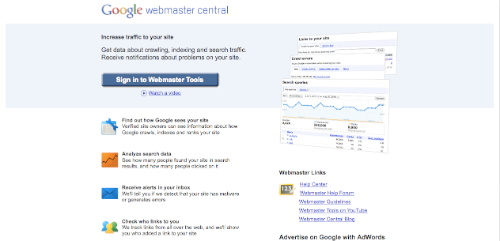
How to Add Blogger Sitemap to Google Webmaster
How to get sitemap for Blogspot?
How to add sitemap for Blogger to Google Webmaster?
How to add sitemap for Blogspot to Google Webmaster?
How to enter sitemap to Google Webmaster for Blogger blog?
How to enter sitemap to Google Webmaster for Blogspot blog?
First, go to Google Webmaster and sign in with your Google Account.
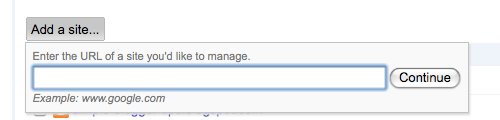
Then, if you have not added your blog, click on "Add a site..." first.
After adding your website, you'll need to verify the site ownership by added a meta tag on your blog. Follow the instructions displayed.
Then, proceed to the dashboard of the site.
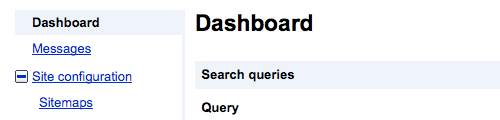
On the left sidebar, expand "Site configuration" and click on "Sitemaps" below it.
Then the next page is where you submit the sitemaps for the blog.

Click on "Submit a Sitemap" and enter the following link extension:
1) This is the basic sitemap you submit first.
| /atom.xml?redirect=false |
2) Then enter the second sitemap. This is to index the first 100 posts on your blog, which means post number 1 until post number 100.
| /atom.xml?redirect=false&start-index=1&max-results=100 |
3) If you have more than 100 posts on your blog, submit this link as well. This will index post number 101 until post number 200.
| /atom.xml?redirect=false&start-index=101&max-results=100 |
4) If you have more than 200 posts on your blog, submit this link as well. It will index post 201 until 300.
| /atom.xml?redirect=false&start-index=201&max-results=100 |
5) Continue adding new sitemaps if you have more posts.
Take note that the more posts you have on your blog, you have to add more sitemaps to index every hundredth posts. Refer to the number in orange and it's pretty self-explanatory.
After submitting the sitemaps, your sitemap list will look more or less like this:
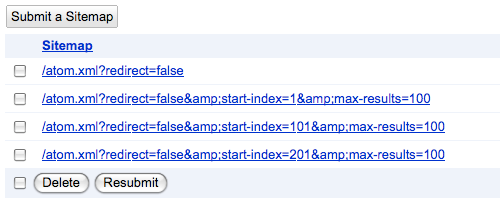
The sitemap links above can accommodate 200 plus blog posts only. If the number of posts exceeds, more sitemaps have to be added for every hundredth.
Why is this "Sitemap submission" necessary?
It helps Google index your blog more efficiently and ultimately provide more traffic to your site via its search engine.
Go ahead and add your blog's sitemap to Google Webmaster now!
Friday, 26 August 2011 1
A tag cloud or label cloud for blogger is a visual depiction of all labels used on your blog.You can see a demo of the Label cloud for blogger(blogger label cloud) here on my site. This Tag Cloud Widget was originally developed by phydeaux3. This is a modded version of phydeaux’s Cloud. This is much better than the Blogger’s Default Label Cloud. First of all Go to Your blogger Layout > Page Elements page and add a Labels Widget there..You can Do that using the Add a Page Element Option on that page. After Adding the Label Widget Go to Layout > Edit Html (Do not expand the widget templates for the sake of easy explanation) You will find some code similar to
Now Replace that withNow findand replace it with
After Adding the Label Widget Go to Layout > Edit Html (Do not expand the widget templates for the sake of easy explanation) You will find some code similar to<b:widget id='Label1' locked='false' title='Labels' type='Label'/>
<b:widget id='Label1' locked='false' title='Labels' type='Label'>
<b:includable id='main'>
<b:if cond='data:title'>
<h2><data:title/></h2>
</b:if>
<div expr:class='"widget-content " + data:display + "-label-widget-content"'>
<b:if cond='data:display == "list"'>
<ul>
<b:loop values='data:labels' var='label'>
<li>
<b:if cond='data:blog.url == data:label.url'>
<span expr:dir='data:blog.languageDirection'><data:label.name/></span>
<b:else/>
<a expr:dir='data:blog.languageDirection' expr:href='data:label.url'><data:label.name/></a>
</b:if>
<b:if cond='data:showFreqNumbers'>
<span dir='ltr'>(<data:label.count/>)</span>
</b:if>
</li>
</b:loop>
</ul>
<b:else/>
<div id='labelCloud'/>
<p align='center'>
<script type='text/javascript'>
var cloudMin = 1;
var maxFontSize = 30;
var maxColor = [35,130,196];
var minFontSize = 13;
var minColor = [35,130,195];
<b:if cond='data:showFreqNumbers'>
var lcShowCount = true;
<b:else/>
var lcShowCount = false;
</b:if>
// Don’t change anything past this point -----------------
// Cloud function s() ripped from del.icio.us
function s(a,b,i,x){
if(a>b){
var m=(a-b)/Math.log(x),v=a-Math.floor(Math.log(i)*m)
}
else{
var m=(b-a)/Math.log(x),v=Math.floor(Math.log(i)*m+a)
}
return v
}
var c=[];
var labelCount = new Array();
var ts = new Object;
<b:loop values='data:labels' var='label'>
var theName = "<data:label.name/>";
ts[theName] = <data:label.count/>;
</b:loop>
for (t in ts){
if (!labelCount[ts[t]]){
labelCount[ts[t]] = new Array(ts[t])
}
}
var ta=cloudMin-1;
tz = labelCount.length - cloudMin;
lc2 = document.getElementById('labelCloud');
ul = document.createElement('ul');
ul.className = 'label-cloud';
for(var t in ts){
if(ts[t] < cloudMin){
continue;
}
for (var i=0;3 > i;i++) {
c[i]=s(minColor[i],maxColor[i],ts[t]-ta,tz)
}
var fs = s(minFontSize,maxFontSize,ts[t]-ta,tz);
li = document.createElement('li');
li.style.fontSize = fs+'px';
a = document.createElement('a');
a.title = ts[t]+' Posts in '+t;
a.style.color = 'rgb('+c[0]+','+c[1]+','+c[2]+')';
a.href = '/search/label/'+encodeURIComponent(t);
if (lcShowCount){
span = document.createElement('span');
span.innerHTML = '('+ts[t]+') ';
span.className = 'label-count';
span.style.color = 'rgb('+c[0]+','+c[1]+','+c[2]+')';
a.appendChild(document.createTextNode(t));
li.appendChild(a);
li.appendChild(span);
}
else {
a.appendChild(document.createTextNode(t));
li.appendChild(a);
}
ul.appendChild(li);
abnk = document.createTextNode(' ');
ul.appendChild(abnk);
}
lc2.appendChild(ul);
</script>
</p>
<noscript>
<b:loop values='data:labels' var='label'>
<span expr:class='"label-size label-size-" + data:label.cssSize'>
<b:if cond='data:blog.url == data:label.url'>
<span expr:dir='data:blog.languageDirection'><data:label.name/></span>
<b:else/>
<a expr:dir='data:blog.languageDirection' expr:href='data:label.url'><data:label.name/></a>
</b:if>
<b:if cond='data:showFreqNumbers'>
<span class='label-count' dir='ltr'>(<data:label.count/>)</span>
</b:if>
</span>
</b:loop>
<br/>Powered By:<small><a href='http://www.bloggerplugins.org'>Blogger Gadgets</a></small>
<br/><small><a href='http://www.bloggerplugins.org/2008/06/label-cloud-widget-for-blogger-blogspot.html'>Label Cloud for Blogger</a></small>
</noscript>
</b:if>
<b:include name='quickedit'/>
</div>
</b:includable>
</b:widget>]]></b:skin>
#labelCloud {text-align:center;font-family:arial,sans-serif;}
#labelCloud .label-cloud li{display:inline;background-image:none !important;padding:0 5px;margin:0;vertical-align:baseline !important;border:0 !important;}
#labelCloud ul{list-style-type:none;margin:0 auto;padding:0;}
#labelCloud a img{border:0;display:inline;margin:0 0 0 3px;padding:0}
#labelCloud a{text-decoration:none}
#labelCloud a:hover{text-decoration:underline}
#labelCloud li a{}
#labelCloud .label-cloud {}
#labelCloud .label-count {padding-left:0.2em;font-size:9px;color:#000}
#labelCloud .label-cloud li:before{content:"" !important}
]]></b:skin>
Save your template and now you should get a working Label Cloud On your Blog.
You can Configure the Gadget from the Gadget Options 
Additional Tweaks
These tweaks are optional. Proceed further only if you want to customize the cloud to a better level... Changing Cloud Colours: you can change those colours editing the code a little bit.. you will have to expand your widget templates and modify these 2 lines of code var maxColor = and var minColor = you have to specify the RGB values there separated by commas..If you are sure of what should be the hex codes of the maximum and minimum colors,then you can use this convertor to convert the hex value to RGB values..If you are not sure of what the hex code of the colors are then have a look at this. Changing the Font Sizes: You can change the font sizes by editing these 2 lines of code var minFontSize = and var maxFontSize =
Your blog earnings depend mainly on your blog's traffic and on your ad placement. One important place to place the ads is below the Post title. It will give more importance to the ads and there is more possibility to get clicks. This is in accordance with the Google Adsense TOS
I am personally using the same hack on this blog. You can see adsense ads below the post title on all my pages.Ok now let us get into the details of how to set it up.
First of all login to your adsense account and generate ad code of optimum size..
Now copy that adsense code into the following box and parse it(you may not see the parser if you are reading my feed)
Copy off the parsed code..
Now login to your blogger account.
Go to Layout > Edit Html and expand the widget templates.
Find this piece of code
Now add the following code just above that line.
I am personally using the same hack on this blog. You can see adsense ads below the post title on all my pages.Ok now let us get into the details of how to set it up.
First of all login to your adsense account and generate ad code of optimum size..
Now copy that adsense code into the following box and parse it(you may not see the parser if you are reading my feed)
Copy off the parsed code..
Now login to your blogger account.
Go to Layout > Edit Html and expand the widget templates.
Find this piece of code
<data:post.body/>
Now add the following code just above that line.
<!-- BloggerPlugins.ORG Adsense Above Posts start -->
<b:if cond='data:post.isFirstPost'>
Put your parsed adsense code here
<br/>
</b:if>
<!-- BloggerPlugins.ORG Adsense Above Posts End -->
<b:if cond='data:post.isFirstPost'>
Put your parsed adsense code here
<br/>
</b:if>
<!-- BloggerPlugins.ORG Adsense Above Posts End -->
Subscribe to:
Posts (Atom)
